Centralizing the application logs in one of the key activities in online application which gives a lot of benefits to both technical and business users. Splunk is the market leader in providing logging solutions and they recently introduced cloud based logging solution. Within few minutes you can convert you plaintext access logs into a lot more meaningful technical & business metrics.
1) Download the universal forwarder from splunk.com and copy to web server (i.e) /opt
2) Linux Install
[root@localhost /]# cd opt/
[root@localhost opt]# rpm -i splunkforwarder-6.2.5-272645-linux-2.6-x86_64.rpm
[root@localhost opt]# /opt/splunkforwarder/bin/splunk start --accept-license
[root@localhost bin]# /opt/splunkforwarder/bin/splunk enable boot-start -user splunk
Init script installed at /etc/init.d/splunk.
Init script is configured to run at boot.
"/opt/splunkforwarder/bin/splunk enable boot-start -user splunk" which sets up the "SPLUNK_OS_USER" variable in /opt/splunkforwarder/etc/splunk-launch.conf
3) Download the universal forwarder credentials (splunkclouduf.spl) to the /opt directory of the machine that will send data to Splunk Cloud.
More details on splunk cloud documentation can be found here.
4) Install the universal forwarder credentials by entering the following command:
/opt/splunkforwarder/bin/splunk install app /opt/splunkclouduf.spl -auth admin:changeme
6) Add data to Splunk Cloud using the command line interface (CLI).
For example, add web application access logs to Splunk Cloud using the following command:
sudo -u splunk /opt/splunkforwarder/bin/splunk add monitor -auth admin:changeme /logs/httpd/access_log -index web_logs -sourcetype access_combined
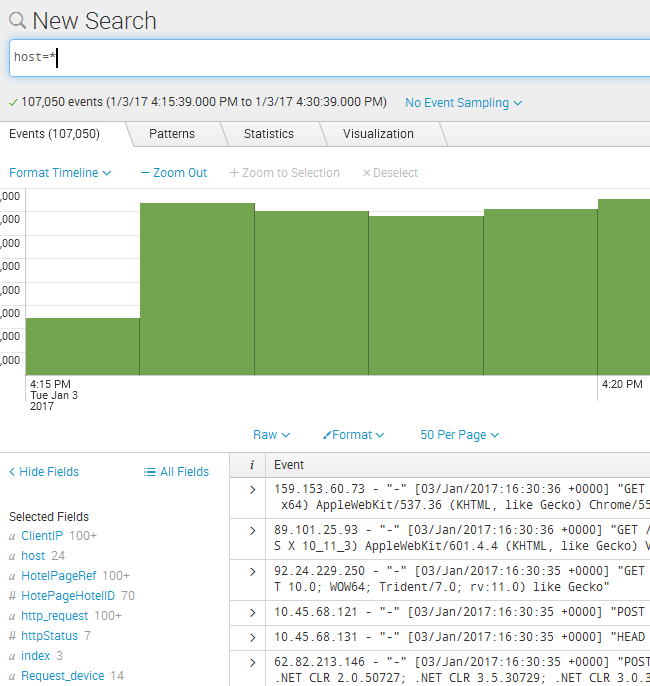
Make sure web server is allowed to send the logs to splunk cloud servers on port 9997 and you can visualize the logs in many ways.
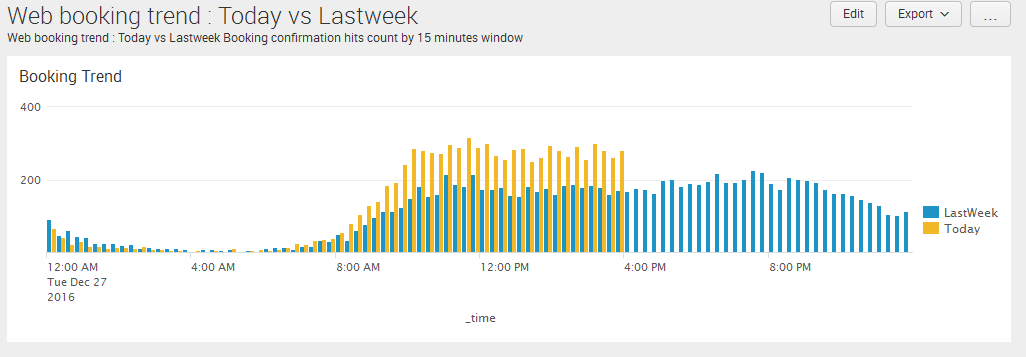
Creating business metrics to see order confirmation.
host=webserver* "GET /booking-confirmation" status=200 earliest=-0d@d latest=-0h@h | eval ReportKey="Today" | search ReportKey=Today | eval _time=_time-(60*60*24*7) | append [ search host=webserver* "GET /booking-confirmation" status=200 earliest=-7d@d latest=-6d@d | eval ReportKey="LastWeek" ] | timechart span=15m fixedrange=false count by ReportKey